
Mastering Cricut Tabs: A Simple Trick for Seamless Assembly
Have you ever needed to extend the size of a Cricut project but weren’t sure how to join the pieces seamlessly? Whether you're designing an oversized greeting card, creating a pocket-style project, or assembling larger designs, adding tabs is a simple yet effective way to connect multiple pieces of cardstock or other materials. In this Tuesday Tip, I’ll walk you through a step-by-step process to add tabs to your shapes, making assembly a breeze.
Why Add Tabs?
Adding tabs allows you to:
- Extend the size of a project beyond your machine’s cutting limitations.
- Create foldable, lockable designs.
- Assemble pockets or layered elements efficiently.
Step-by-Step Guide: Adding Tabs to a Square
1. Create Your Base Shape
Start with a simple square shape in Cricut Design Space. If you want a finished piece that’s 7 inches by 7 inches when assembled, create a square of that size. This will serve as one half of your final project.

2. Duplicate the Shape
You'll need a second identical square for the back piece of your project. Simply duplicate your original square so you have two identical pieces.

3. Design the Tabs
Now, it’s time to add the connecting tabs.
- Create a rectangle that is 0.5 inches wide and 7 inches tall (to match the square's height).
- Change its color to distinguish it from the main shape.
- Position this rectangle along one edge of the square—this will serve as the folding tab.

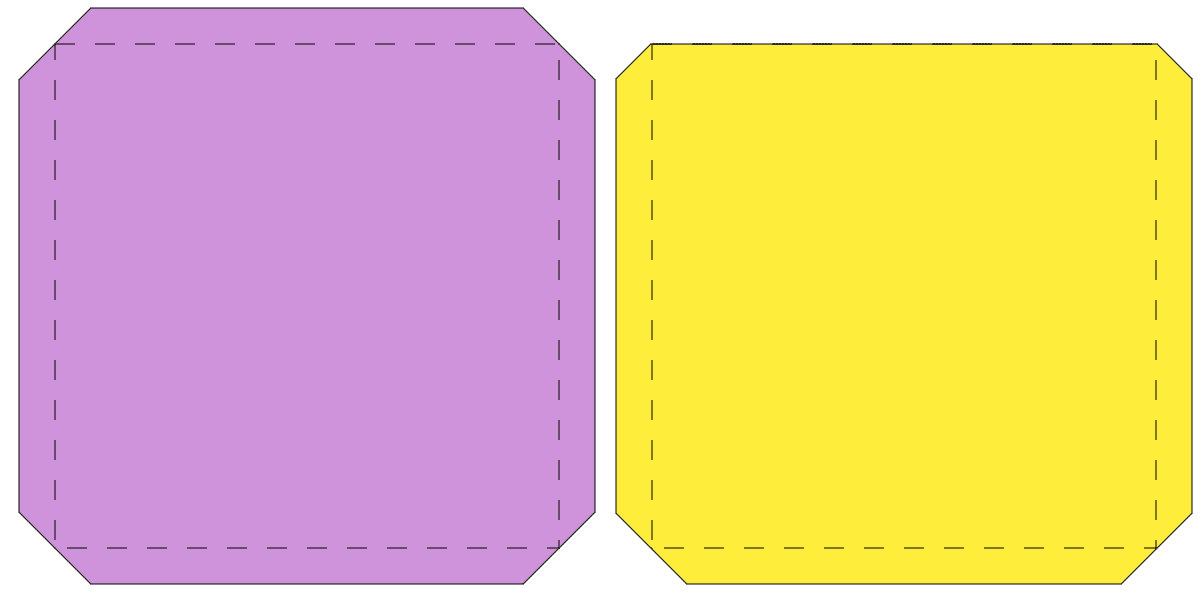
4. Shaping the Tabs
To make assembly cleaner, cut off the top and bottom corners of your tab to create angled edges. Here's how:
- Insert a second square and rotate it 45 degrees.
- Position it over the top corner of your tab rectangle so it overlaps just enough to remove the pointed end.
- Use the Slice tool to cut away the corner.
- Repeat the process for the bottom edge.

5. Duplicate and Position the Tabs
You'll need four tabs—one for each side (left, right, and bottom). You can opt to leave off the top tab is you wish. To do this:
- Duplicate the original tab and position it on the opposite side.
- Flip one tab horizontally so it aligns properly.
- Create a third tab for the bottom edge, rotating it 90 degrees to fit. Repeat for the top tab.
- Align all tabs perfectly using the Position tool.

6. Weld Everything Together
Select all four tabs along with the base square and weld them together. This ensures they become one solid piece, ready for cutting.

7. Add Score Lines
Since the tabs need to fold, add score lines along their inner edges:
- Select the Score tool and draw a line where each tab meets the main shape.
- Attach the score lines to your design so they cut correctly.

8. Final Assembly
Once cut, fold the tabs along the score lines and use adhesive to attach the front and back pieces together. The result? A seamless pocket or extended shape ready for embellishments! With the top tab, you can fold it and glue it on the inside so the top edge will not tear as easily.

Final Thoughts
Adding tabs to a shape in Cricut Design Space is a game-changer for large-scale and interactive paper crafts. With this simple technique, you can create larger cards, pockets, and other layered designs with ease. Try it out on your next project and see the difference it makes!
Happy crafting!
You can grab an Access membership at anytime to use this feature.

 DIY Home Decor DIY Craft Tutorials, DIY Paper Flowers
3 replies to "How to Add Tabs to a Shape for Seamless Cricut Projects"
Thank you so much for sharing your design for adding tabs. You make creating easy and fun!
Thank you, I have wondered how to do this from the time I made the Suprise box layers with the ephemera. I wanted to make other layers and pockets. I tried to do it for a Christmas gift card to put money in and that was a crafting fail, but I had a good time trying. Now, thanks to you I know how to do it!
I am so glad you are able to do this now. We love offering these tips – more to come
Bette Daoust recently posted…How to Add Tabs to a Shape for Seamless Cricut Projects