Unlocking Advanced Shapes in Cricut Design Space: A Step-by-Step Guide
Cricut Design Space provides a variety of basic shapes, but did you know there’s a way to unlock even more design possibilities? Advanced shapes allow you to create custom projects, add unique embellishments, and craft intricate cut files without relying on pre-made designs. Whether you want to design layered artwork, decorative frames, or personalized stencils, using More Shapes gives you greater creative freedom. In this tutorial, I’ll guide you step-by-step on how to use these advanced shapes to enhance your Cricut projects.
Step-by-Step Guide: Advanced Shapes
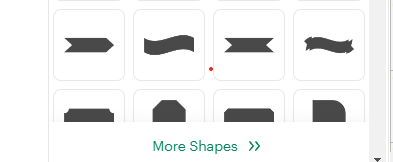
Accessing More Shapes
- Open Cricut Design Space and create a new project.
- Click on Shapes in the left-side toolbar.
- Scroll to the bottom and click on More Shapes.
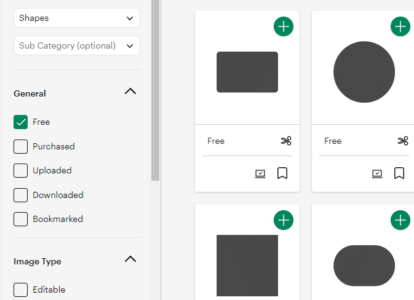
- Filter the shapes by clicking on Free to display all available free shapes.
You’ll now see a variety of new shapes, including decorative elements, frames, and cutout designs.
Selecting and Adding a Shape
- Browse through the available free shapes.
- Click on a shape to add it to your canvas.
- Resize or rotate the shape using the corner handles.
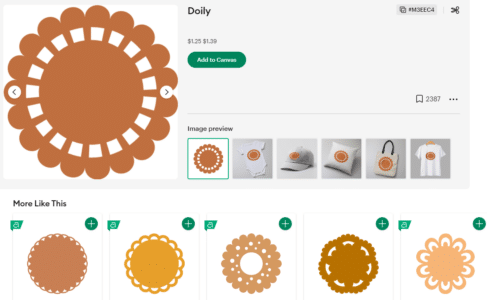
For example, let’s choose a scalloped circle (doily) and bring it onto the canvas. It does show a price but it is actually FREE.
Using Contour to Customize Shapes
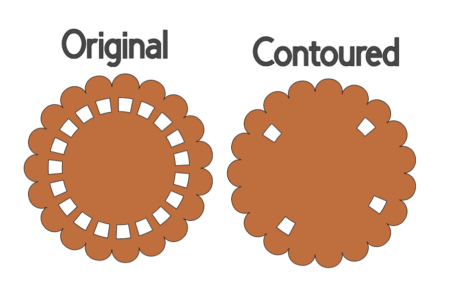
The Contour tool allows you to remove unwanted cutout sections from a shape. Here’s how:
- Select the shape on the canvas.
- Click on Contour at the bottom right.
- Click on the cutout sections you want to remove.
- Close the Contour window to see your updated shape.
For instance, if your scalloped circle has holes in it, you can use Contour to hide those and get a clean, solid shape.
Combining Shapes for Unique Designs
You can layer and modify shapes to create entirely new designs. Here’s how:
- Add another shape to your canvas (e.g., a heart arch).
- Resize and align the two shapes using the Align tool.
- Use the Slice tool to cut one shape out of the other.
After slicing, you’ll have extra pieces—some of which you can remove or repurpose for other designs.
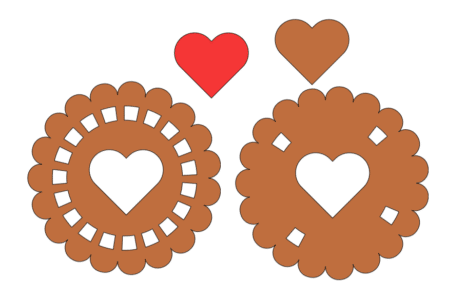
Enhancing Your Design with Additional Elements
Go back to More Shapes and choose another element (e.g., a bow or a heart mandala).
- Add it to your canvas and adjust the size.
- Change the color using the Fill option.
- Position it strategically within your design.
For example, you can place a heart mandala inside the scalloped circle or layer a bow on top.
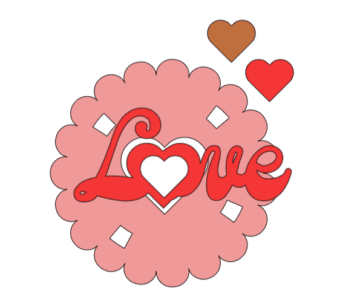
Grouping, Flattening, or Cutting Your Design
Once your design is complete, you have a few options:
- Group: Keeps all elements together for easy resizing.
- Flatten: Converts the design into a single-layer printable cut file.
- Cut Separately: Leaves the elements as individual pieces for multi-layer projects.
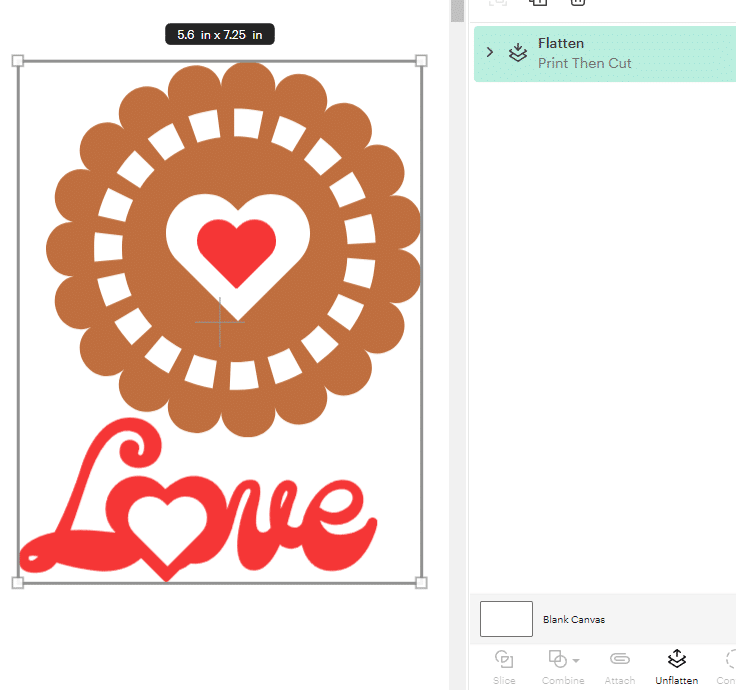
Final Thoughts
By exploring More Shapes in Cricut Design Space, you unlock a world of possibilities beyond basic circles and squares. Experiment with different shapes, use Contour to refine designs, and combine elements to create custom cut files for your crafting projects.
Now it’s your turn! Try these steps in your next Cricut project and let me know how it goes. Happy crafting!
You can grab an Access membership at anytime to use this feature.



 DIY Home Decor DIY Craft Tutorials, DIY Paper Flowers
8 replies to "Master Cricut’s Secret Shape Features in Just a Few Clicks"
Trying to find Free Affirmations from debossing webinar offer
https://bettesmakes.com/affirmations
Thank you so much Bette, I never knew there was more free shapes, I figured they would all require the monthly payment to get more…..thank you again, and for showing us how to vary these shapes.
It is nice to know that you can get a lot of free things through Design Space
Bette Daoust recently posted…Master Cricut’s Secret Shape Features in Just a Few Clicks
Is there a tutorial for making your own digital paper? I have watched a few YouTube videos but have not found exactly what I wanted. I love working with digital papers and would like to try my hand at making them in Procreate.
Hi Mary Lou – we do not have anything for Procreate at this time.
Thank you for the tip. I appreciate learning different techniques in Design Space.
Thank you for this Bette! It never occurred to me that there would be more free shapes!