
Master Personalizing Cricut Designs by Separating, Coloring, and Layering Elements
If you’ve ever found the perfect Cricut image—but wished you could tweak the colors, move elements around, or make it truly yours—you’re not alone. One of the most exciting (and sometimes overlooked) features of Cricut Design Space is the ability to customize editable images. With just a few clicks, you can separate grouped items, change colors to match your project theme, and layer pieces for a professional, polished look.
In this step-by-step guide, you’ll learn exactly how to unlock the power of personalization. Whether you’re customizing designs for T-shirts, cards, home decor, or gifts, mastering these skills will open up a whole new world of creative possibilities.
Let’s dive in and start turning those ready-made Cricut images into one-of-a-kind masterpieces!
Step 1: Selecting Edible Images
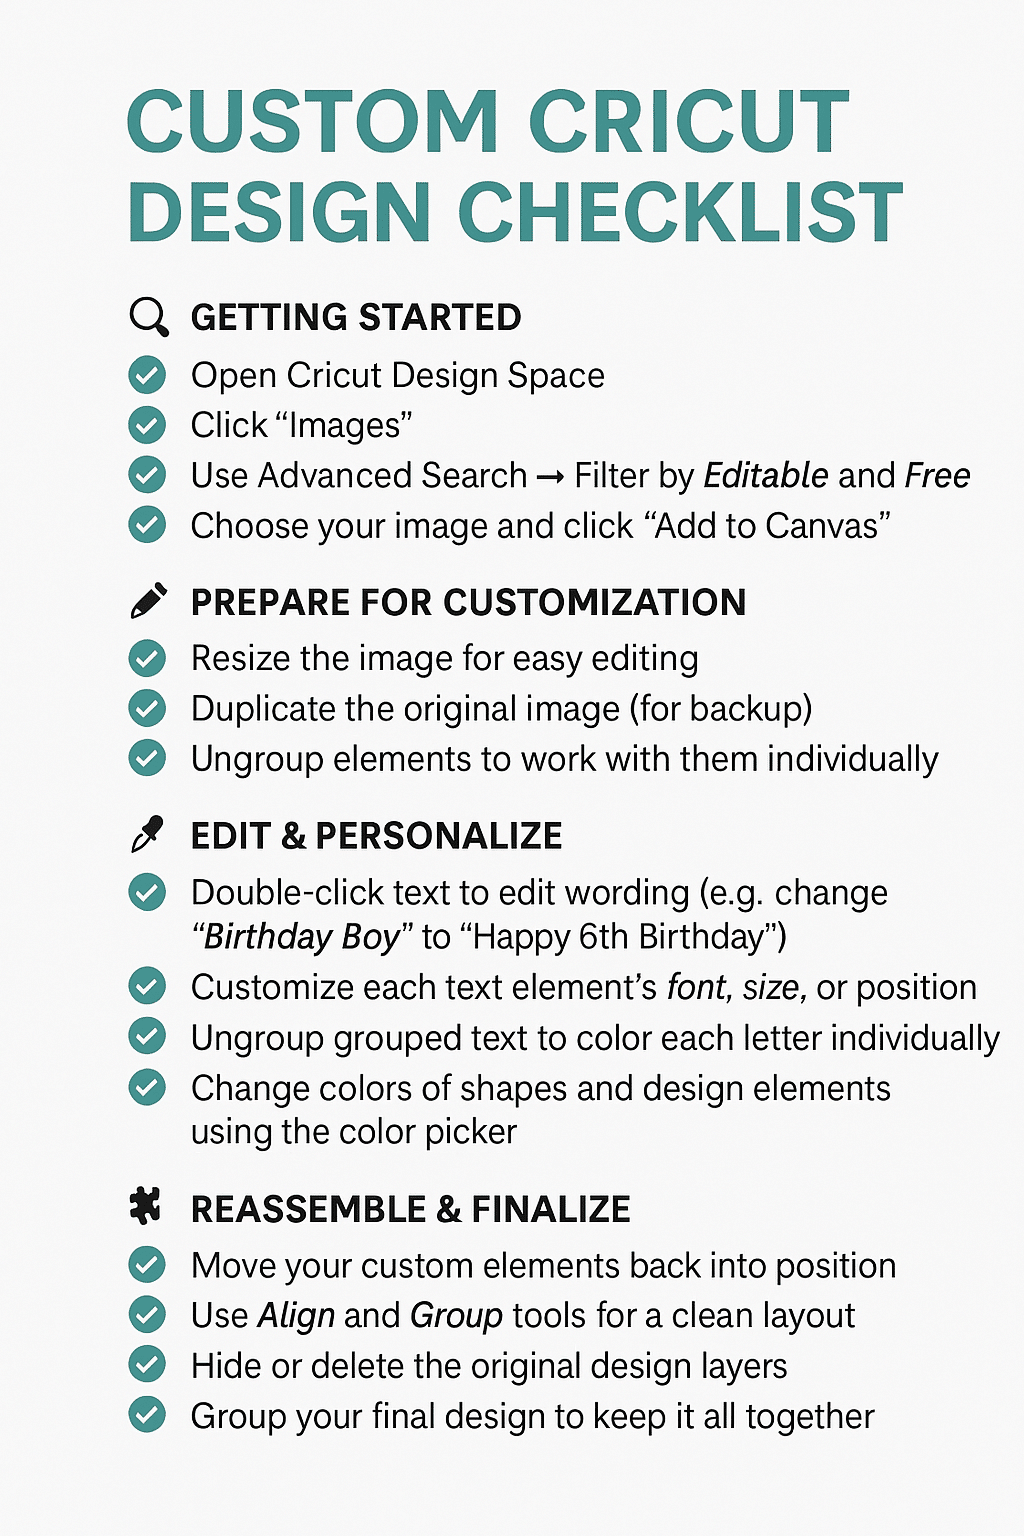
- Launch Cricut Design Space on your desktop or mobile device and log in to your account. This is your creative workspace where all your projects come to life.
- On the left-hand toolbar of your canvas screen, click “Images.” This opens the Cricut Image Library, where you can browse thousands of ready-to-use designs.
- In the top-right corner of the image library, click “Filter” (or “Advanced” depending on your device). This narrows down your search options so you can find exactly what you need more efficiently.
Under the filter options:
- Check the “Editable” box to show only designs that can be customized—these are images specifically made for personal adjustments like changing colors, layers, and more.
- Then, select “Free” to make sure you’re only browsing images that are available to everyone at no cost.
This step ensures that you're working with flexible and budget-friendly designs that anyone can follow along with.
- Browse the filtered results and select an image you like. For example, try “Birthday Boy”—it’s a popular editable image with grouped elements that are great for practicing layering, separating, and recoloring.
- Click on the image and then hit “Add to Canvas” to begin customizing!
Step 2: Add the Image to Your Canvas
Once you’ve selected your editable image, it’s time to bring it into your design workspace:
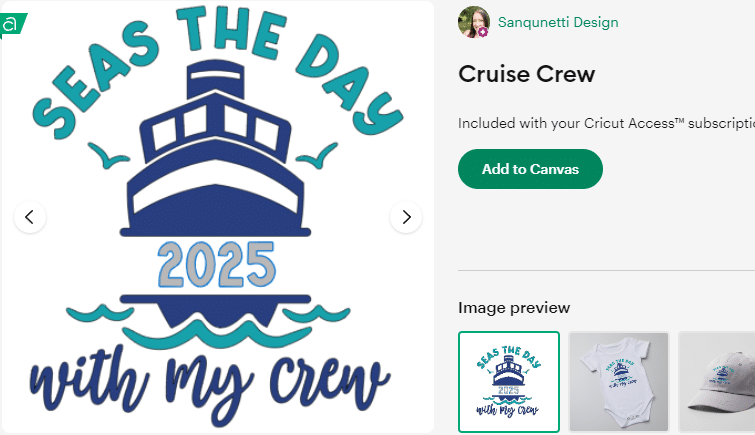
- Click on the image you want to use from the search results. It will highlight with a green or blue border.
- Then, click the “Add to Canvas” button in the bottom right corner. This places the image onto your main design screen (called the Canvas).
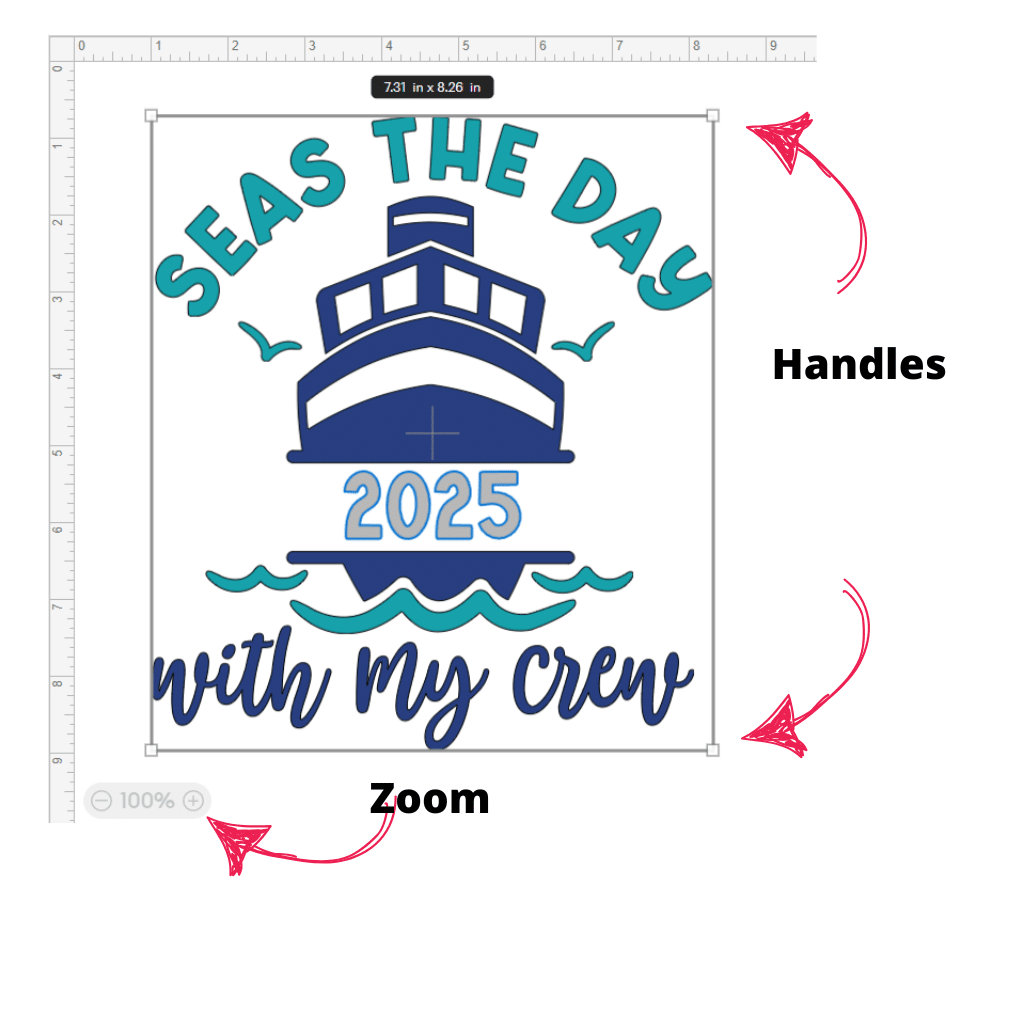
Once your image appears on the Canvas, you might notice it looks a bit small or the elements seem bunched together. To make editing easier:
- Click and drag the corner handle of the image box to resize it. You can also use the Size box in the top toolbar to enter specific dimensions.
- Zoom in if needed using the zoom slider in the bottom left corner of the screen.
Resizing helps you get a better view of all the individual elements, making it much easier to ungroup, recolor, and layer them in the next steps..
Step 3: Editing Text Elements
Many editable Cricut images include pre-set text that you can customize to suit your project. Here’s how to make it your own:
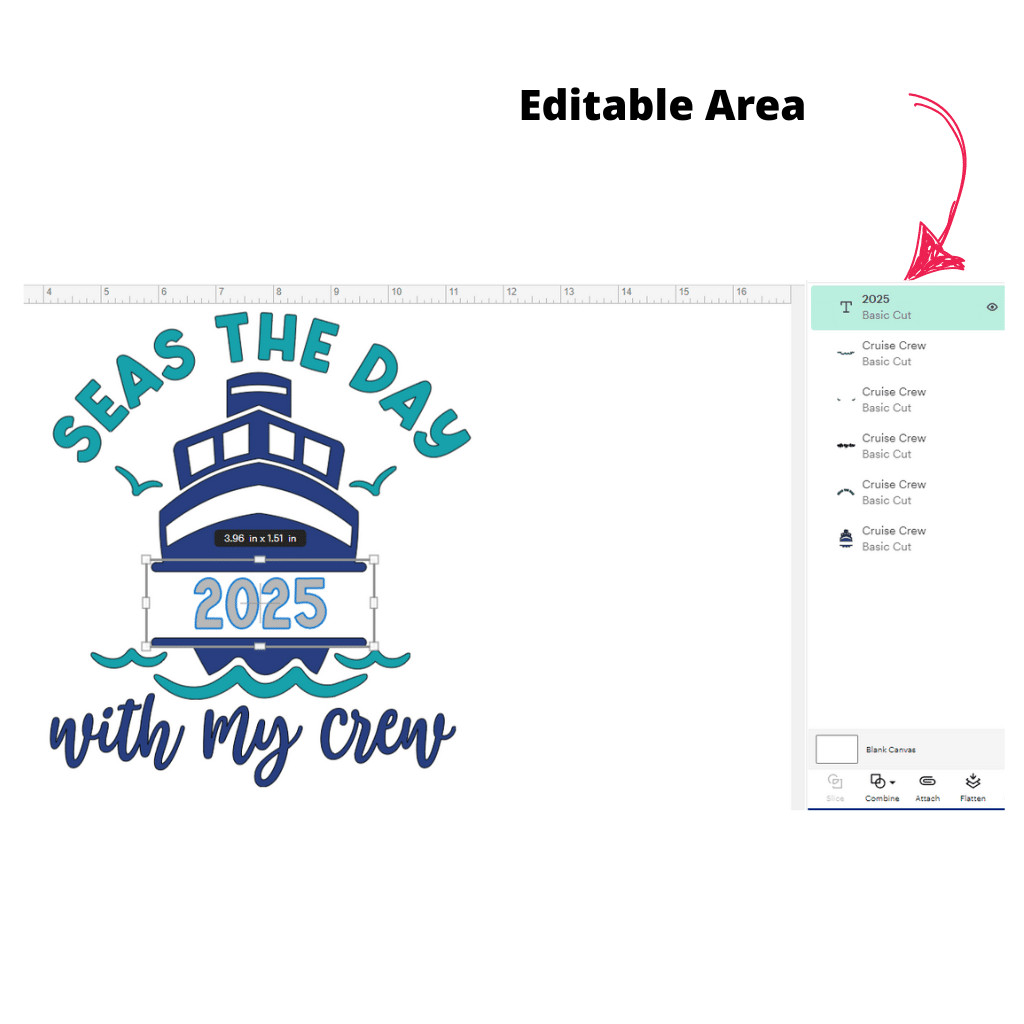
- Identify the editable text areas in your design. These are usually labeled with bold or playful fonts and might stand out in color. If you’re unsure, look for layers labeled with text in the Layers panel on the right side of the screen.
- Double-click on the text box directly on the Canvas. This will activate the text editing mode, allowing you to make changes.
- Type in your custom message. For example, you could change “Birthday Boy” to “Happy Birthday” and add a name or age like “Happy 6th Birthday!”
- Once edited, click outside the text box to see your changes.
- Adjust the position of the new text if needed by clicking and dragging it. Use alignment tools in the top toolbar for precise placement.
Pro Tip: If your new text is longer or shorter than the original, you may also want to resize or change the font to keep everything visually balanced.
Step 4: Customize Color of Individual Elements
Adding your own color scheme is one of the best ways to make a Cricut design feel truly personalized. Here’s how to easily update colors, even when elements are grouped together:
- Click on the grouped design (for example, a row of birthday hats or balloons). Grouped items move as one unit until separated.
- To work with elements individually, first duplicate the group so you have a backup. Right-click on the group and select “Duplicate.” This creates a copy you can set aside just in case you want to revert or reuse original elements.
- Move the duplicate group off to the side of your Canvas so it doesn’t interfere with your edits.
- Now, select the group you want to edit and click “Ungroup” in the top toolbar. This separates the elements so you can work with each one individually.
- Click on a single element (like one hat), and open the color selector at the top of the screen. You can now choose any color you like from the palette or enter a custom HEX code to match your project theme.
- Repeat this for each individual element you want to recolor. This step is perfect for matching party colors, holidays, or personal preferences.
Pro Tip: If your image contains layers (like shadows or outlines), make sure you’re selecting the correct layer in the Layers panel before changing the color.
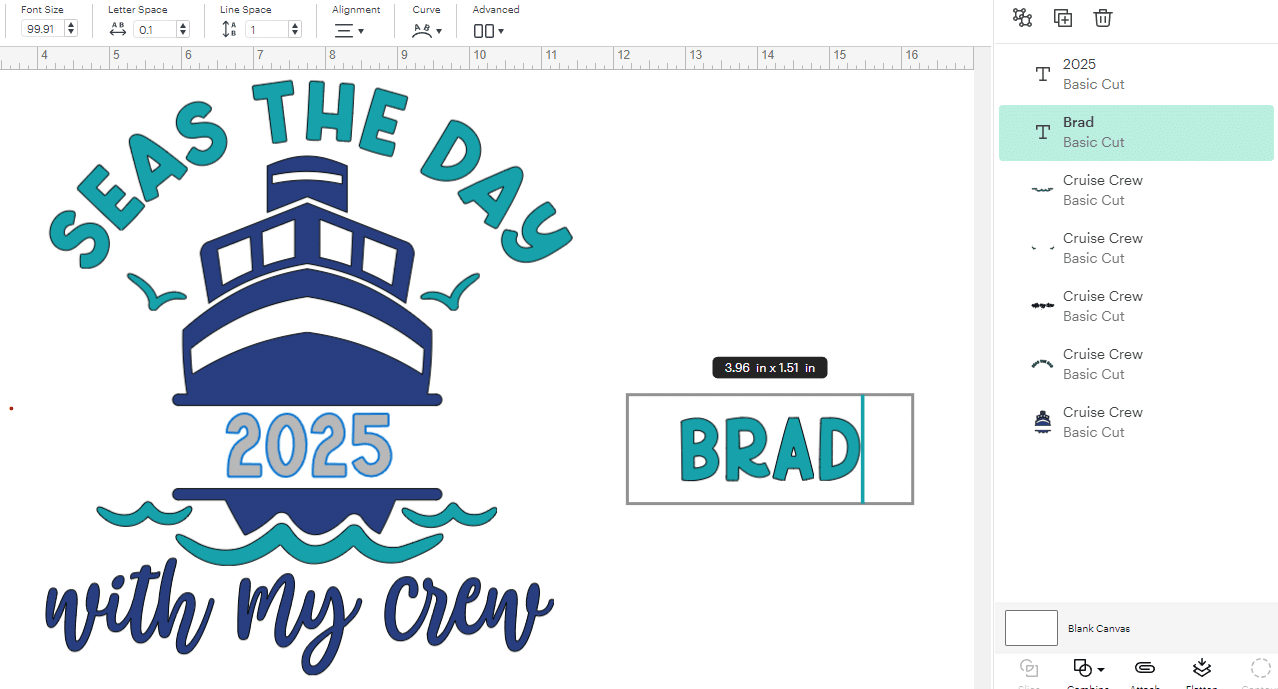
Step 5: Customize Grouped Text Elements
If your design includes grouped text—like the word “Birthday” with fun, stylized letters—you can take it a step further by customizing each letter individually. This is a great way to add color, personality, and a professional touch.
- Click on the grouped text (e.g., the word “Brad”). It will select the entire word as a single object.
- Right-click and choose “Duplicate” to create a backup version. Move it aside so you can always return to the original if needed.
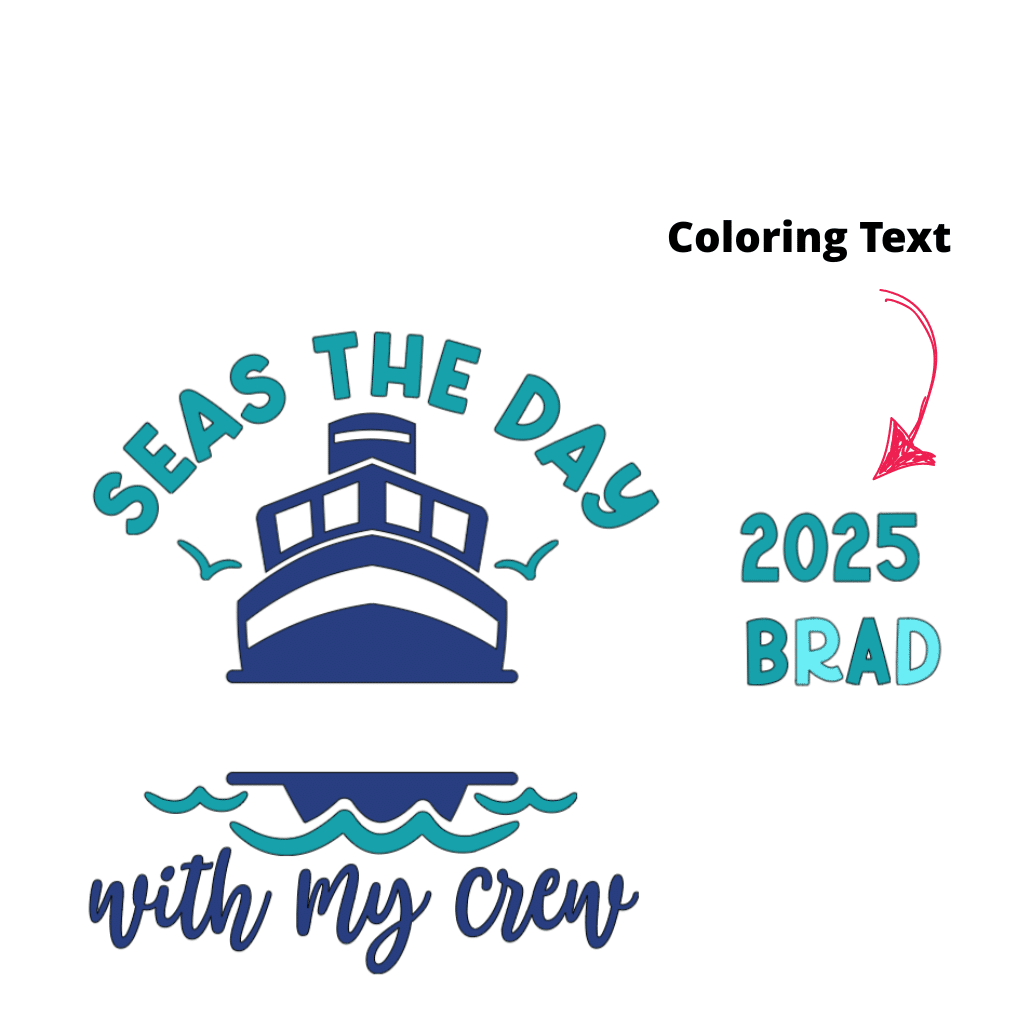
- With the duplicate selected, click “Ungroup” in the top toolbar. This separates the word into individual letters, allowing you to edit each one on its own.
- Click on a single letter, then go to the top toolbar and use the color palette to select a new color. Repeat this step for each letter to create a rainbow effect, match a party theme, or just add some fun variety.
- Once you’ve customized the colors, reposition the letters as needed to maintain spacing and alignment. Use the “Align” tools (top toolbar) to keep everything neat.
Pro Tip: Want to reuse this colorful word in future projects? Select all the letters again and click “Group” to keep them together, then right-click and choose “Save as Project” so it’s ready anytime.
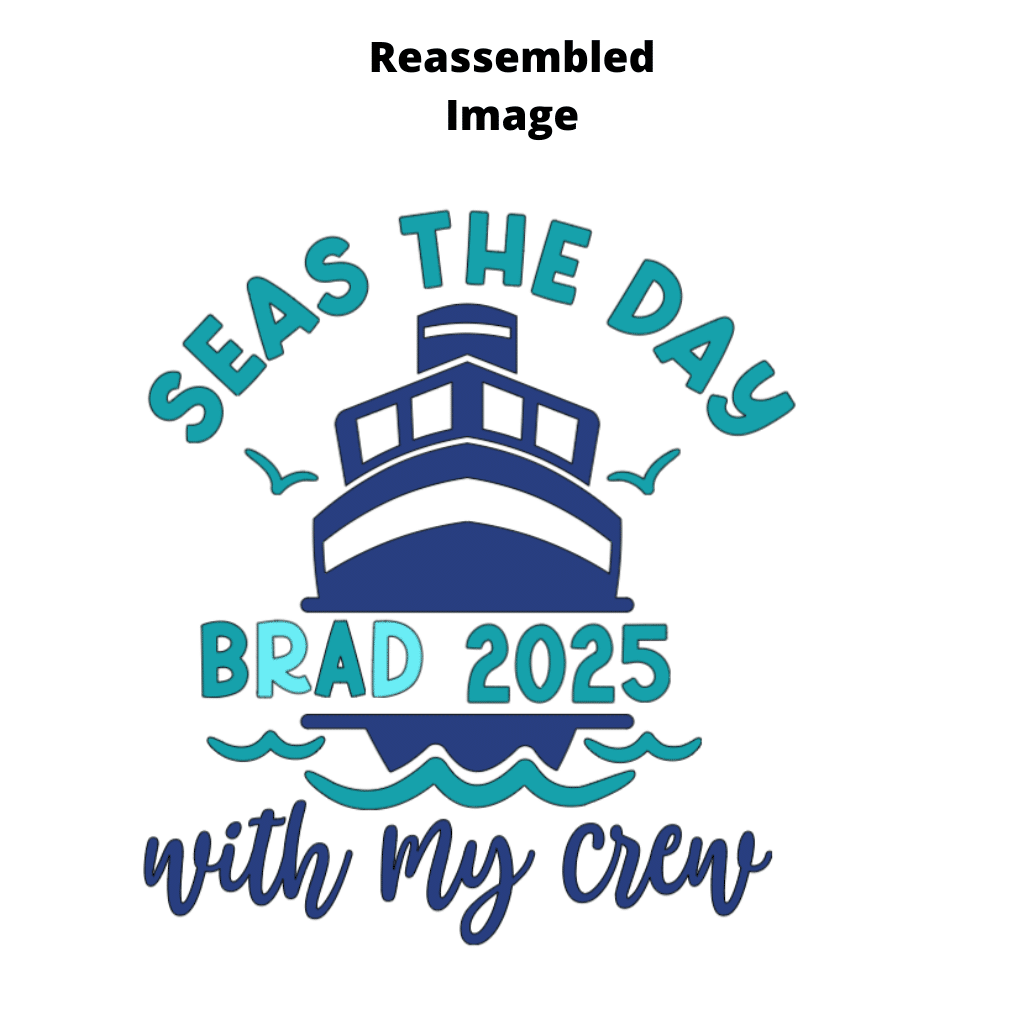
Step 6: Reassemble Your Customized Elements
Now that you've personalized your colors and text, it’s time to bring everything back together to complete your design:
- Select and move each customized element (text, shapes, or images) back into place on your Canvas. You can use the original image as a guide, or align elements visually based on your new layout.
- Carefully position each piece where it belongs—like placing letters back into a word, or aligning decorative elements to their original spots. Take your time to make sure everything looks balanced and well-spaced.
- Use the “Align” tool (found in the top toolbar) to make positioning easier. For example, you can align items by top, bottom, center, or distribute them evenly across the design.
- Once everything looks just right, consider grouping the elements again by selecting them all and clicking “Group.” This keeps your design together and prevents pieces from shifting while you work on the next steps.
Pro Tip: If your customized elements replace an original design completely, you can delete the original version once you're confident your updated version is complete.
Step 7: Finalize Your Customized Design
Now that your new elements are in place, it’s time to tidy up and prepare your project for cutting or saving:
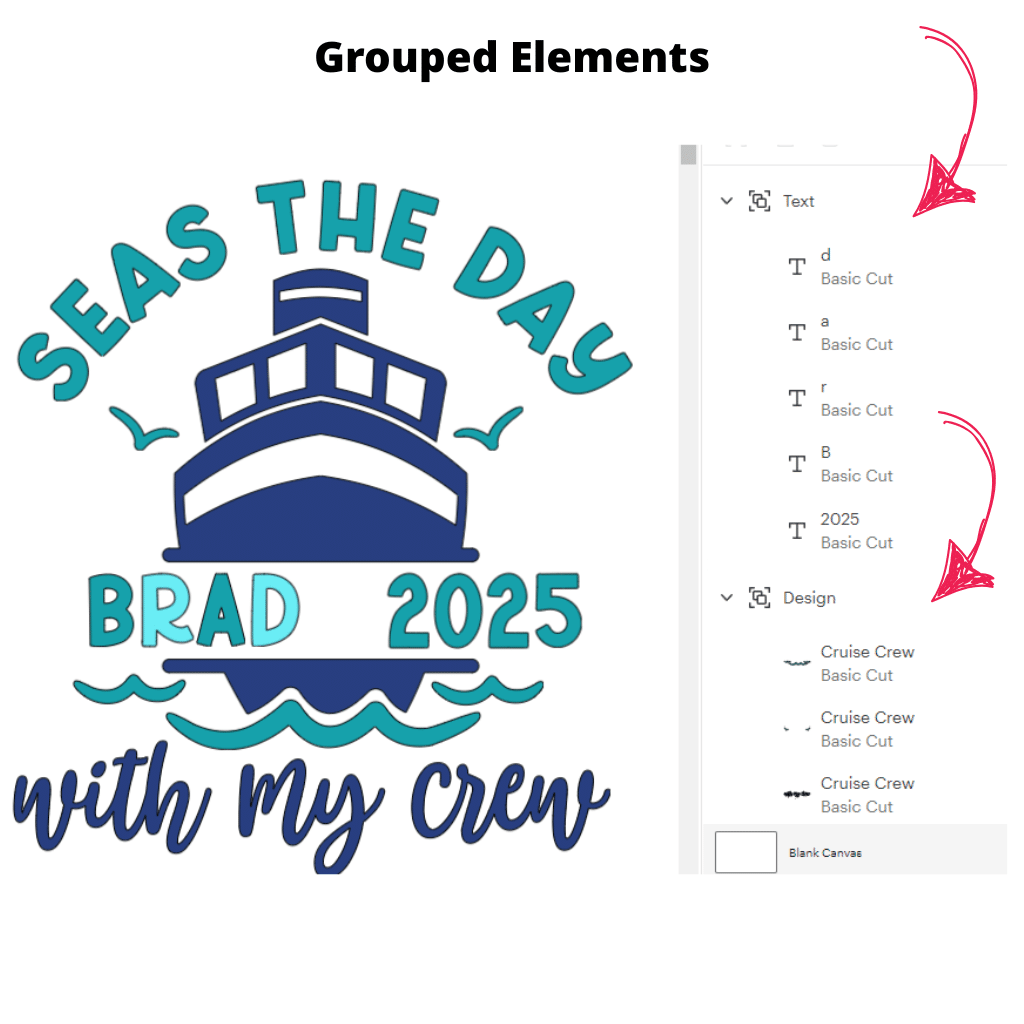
- Open the Layers panel on the right side of Cricut Design Space.
- Look for the original design layers—these might still be visible underneath your customized version.
- To clean up your workspace, click the eye icon next to each original layer to hide them. This ensures only your updated, personalized elements remain visible and active.
- Next, select all of your new customized elements. You can do this by:
Clicking and dragging a selection box around your entire design, or
Holding Shift and clicking each element manually. - With everything selected, click “Group” in the top toolbar. Grouping locks your elements together, making them easier to move, resize, or duplicate as a single unit.
Pro Tip: If your design is ready to cut, you might also want to click “Attach” (especially if you want pieces to cut exactly where they appear on the Canvas), or “Flatten” if you're planning a Print Then Cut project.
Step 8: Use Your Custom Design
Now that your personalized Cricut design is complete and grouped, you're ready to bring it to life!
- Double-check your grouped design on the Canvas to ensure everything looks correct—colors, placement, and alignment.
Depending on your project type, choose one of the following next steps:
- For cutting vinyl, cardstock, or iron-on, click “Make It” and follow the on-screen prompts to load your material and blade.
- For Print Then Cut projects, first select the entire design and click “Flatten” in the bottom right. Then click “Make It” to print your design on your home printer before cutting it with your Cricut.
- Load your material into your Cricut machine and complete your project—whether it’s a card, T-shirt, party banner, or a one-of-a-kind decor piece.
- Once your project is finished, consider clicking “Save” and naming your design. This way, you can reuse it later or modify it for another occasion.
Pro Tip: If you love the result, export or share a photo of your project to social media or your Cricut community—show off your creativity!
Final Thoughts
Editable images in Cricut Design Space unlock a world of creative potential. With just a few thoughtful steps—duplicating elements, customizing colors, adjusting text, and reassembling your layout—you can transform a basic design into something truly unique and meaningful.
Whether you're crafting for a birthday, holiday, gift, or special event, these techniques empower you to tailor every project to your style and purpose. The best part? Once you master these simple tools, you'll never feel limited by a pre-made design again.
So go ahead—mix, match, personalize, and let your creativity shine!
You can grab an Access membership at anytime to use this feature.

 DIY Home Decor DIY Craft Tutorials, DIY Paper Flowers