Does the thought of iron-on make you cringe? Are you ready how to do some iron-on with Glitter Heat Vinyl?
Simple Glitter Iron-On Cricut Craft Project
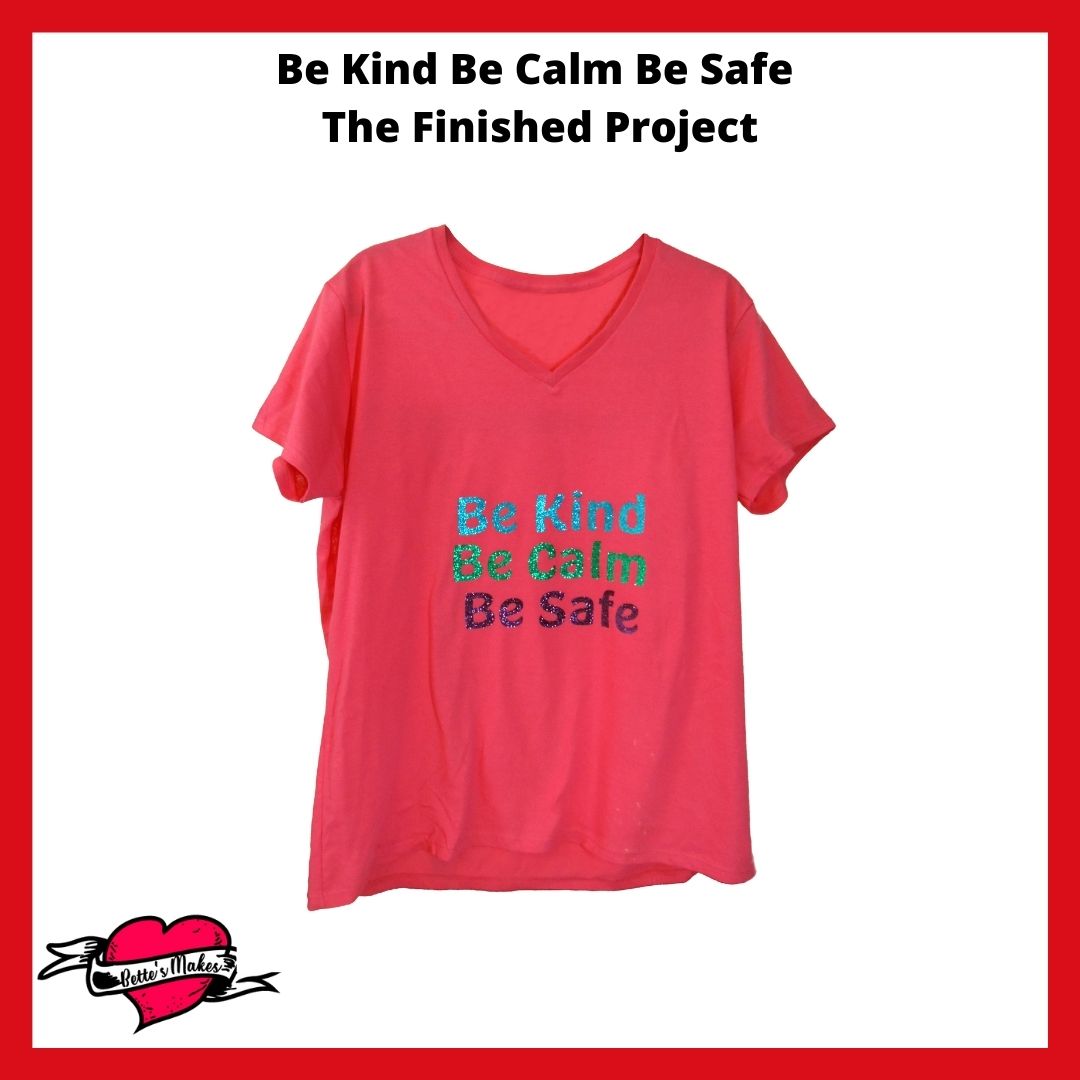
Iron-On does not have to make you cringe, once you get the hang of it, you will be making so much more with your Cricut. This project has been designed for the Cricut Joy, Air 2, and the Maker. It is very versatile and the lettering can be rotated to fit any machine. The theme of this pattern is Kindness and to help others through tough moments in their lives. This is a saying used by a Health Expert where I live and I fell in love with it as Kindness is the key to happiness (at least for me).
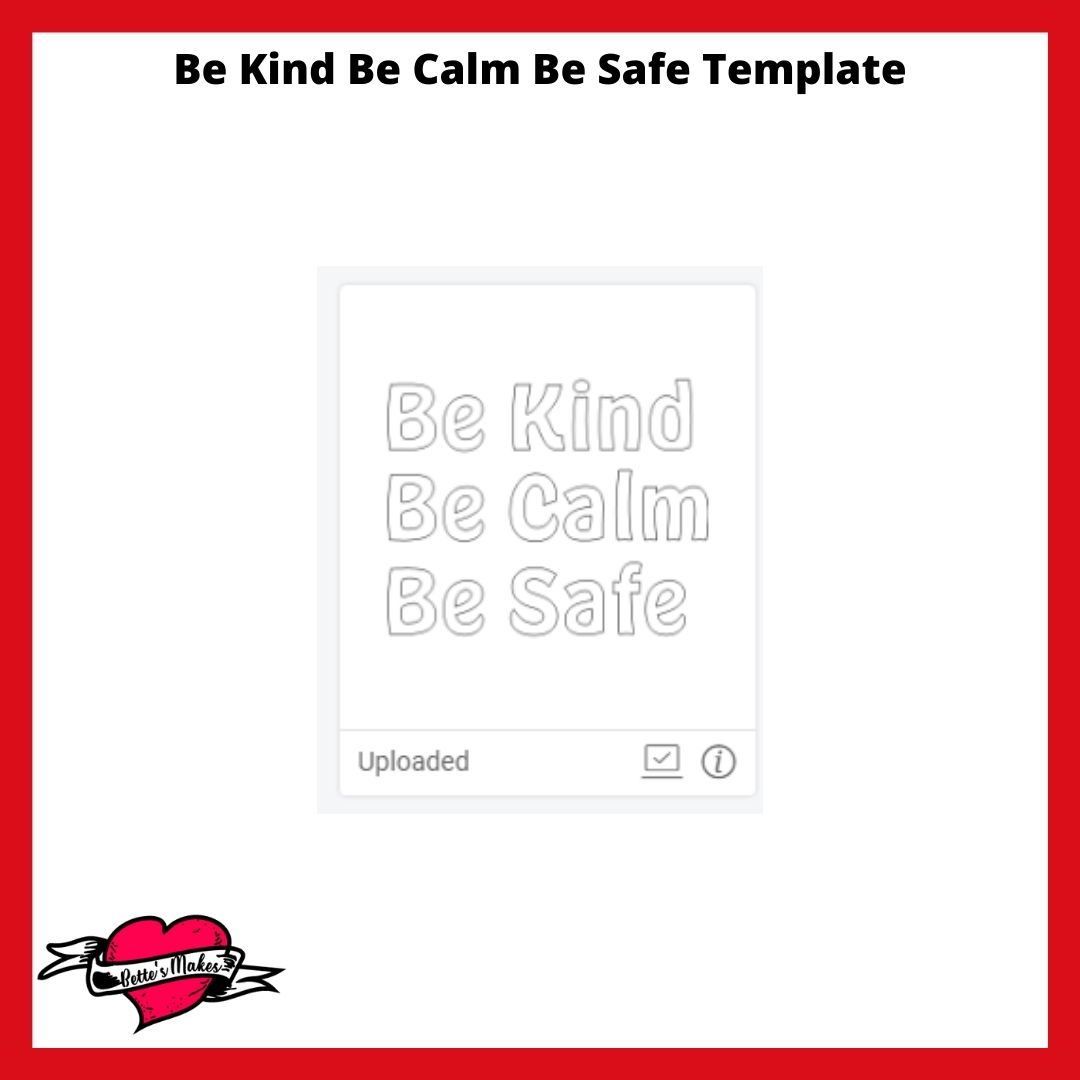
For today's project you will need to head off to my resource library and pick up the Be Kind Be Calm Be Safe SVG file you will need.
Cricut Tips & Shortcuts
Secrets Every Cricut Owner Should Know
Every Cricut owner needs to know these SECRETS in order to save time & money so they can craft more. Insiders know these secrets but do you? Are you ready to make your Cricut work better for you?
Get the insider information you never knew and save money at the same time. This FREE Tip & Shortcut guide will show you how you can have your equipment and machine supplies last longer so you can make even more!
Here’s what you need to make your Glitter Iron-On Project. This post does contain some affiliate links for your convenience (which means if you make a purchase after clicking a link I will earn a small commission but it won’t cost you a penny more)! Read my full disclosure policy.
Quick Links to Information in this Post
Glitter Iron-On Materials
Glitter Iron-On Step-by-Step Guide
Step Two - Design Space Adjustments
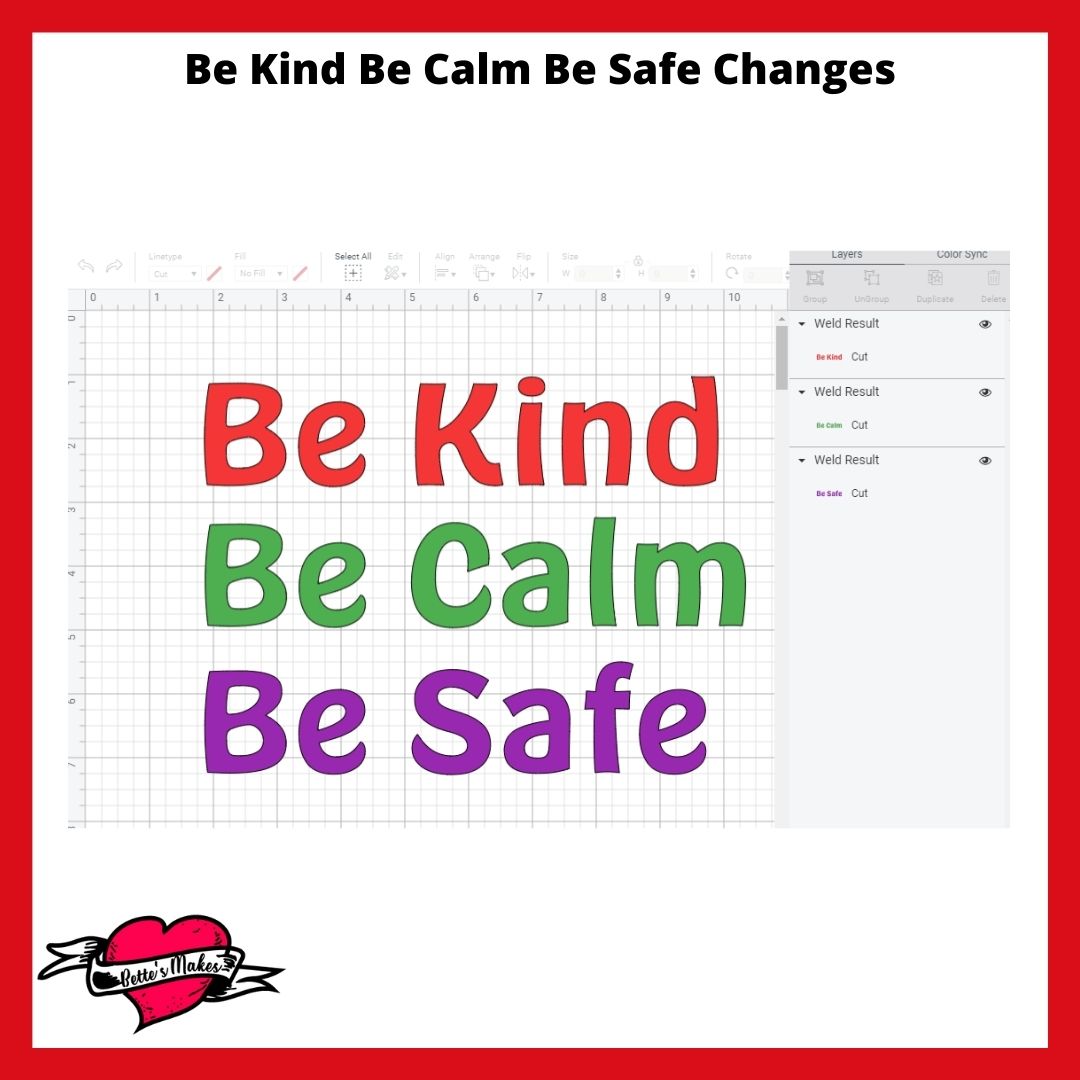
In this project, we will be making a few adjustments through grouping and welding.
1. Start with Ungrouping the entire design.
2. Select the first line "Be Kind" and change the Color to what you would like to see.
3. While the words are still selected, click on the Weld button on the bottom right of the screen.
4. Repeat steps 2 and 3 for the other 2 lines.
You should end up with something similar to the diagram shown.
Step Three - Save and Make It
Time to Save your project then click on Make It.
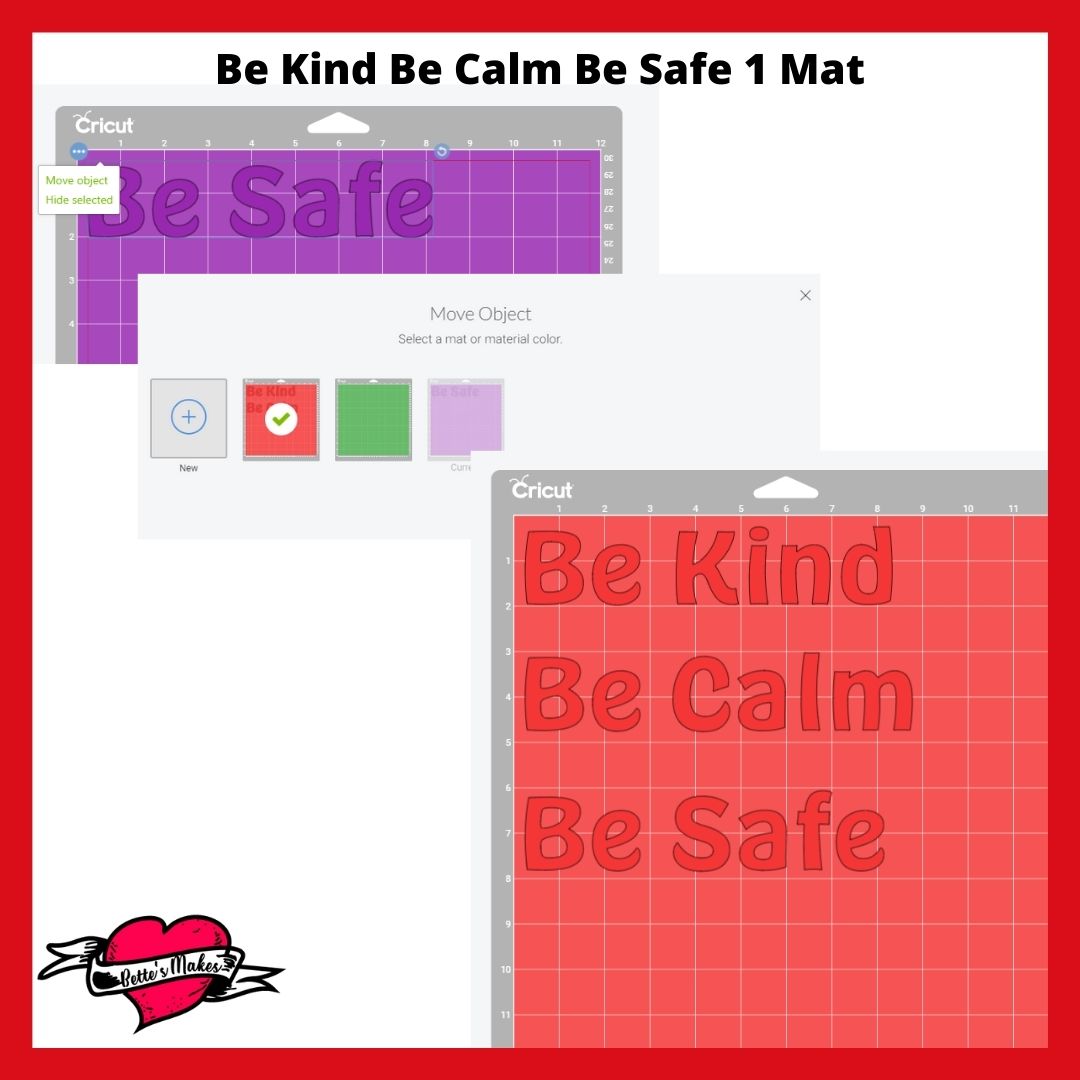
With 3 different colors, your design will show on 3 different mats.
To save on cutting time and save on how much vinyl you use, you can move all 3 word sets to a single mat, the cut out the vinyl pieces to fit.
In other words, you can spread out your design on one mat then cut smaller vinyl strips to cover each word.
Step Four - Cutting the Design
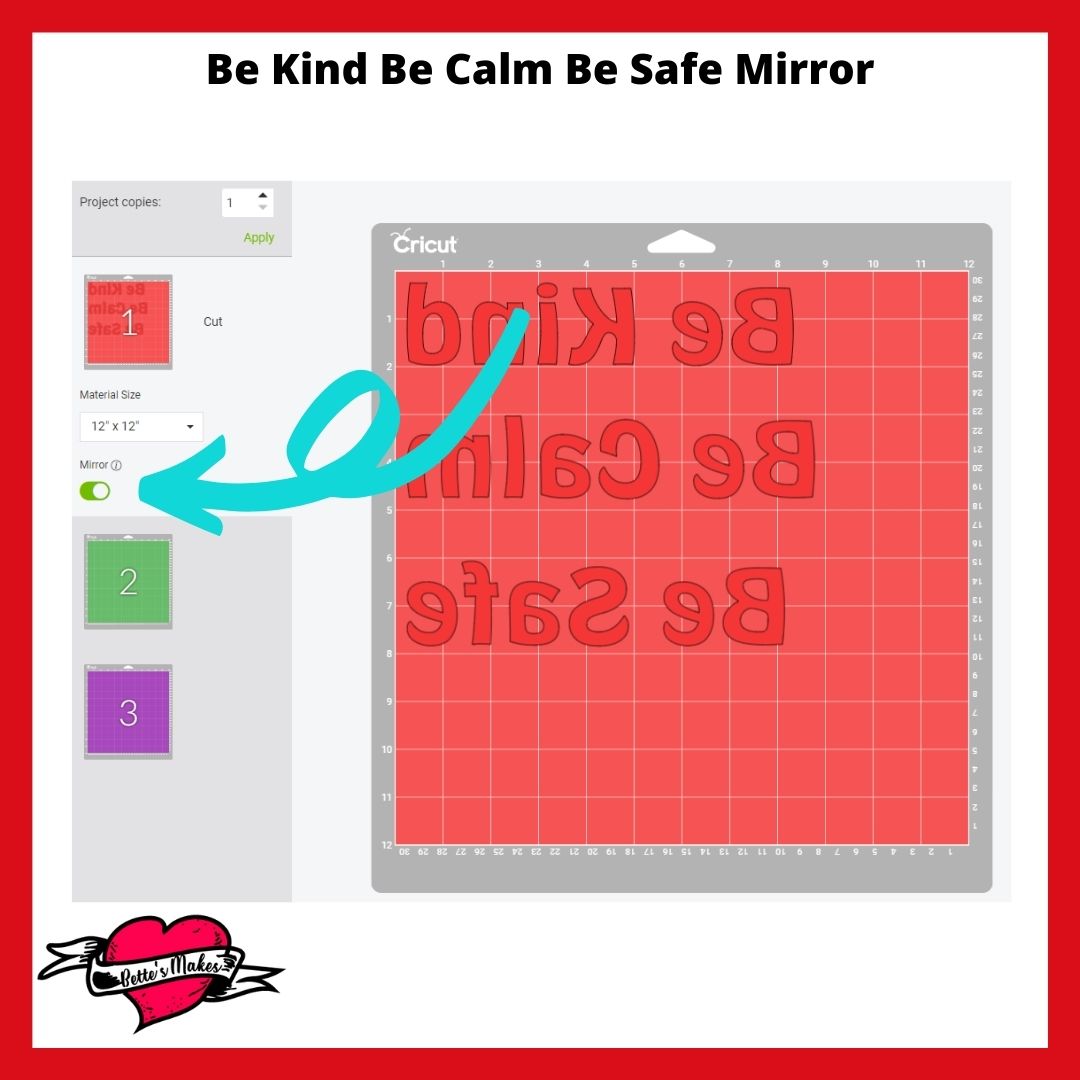
Now you have your mat ready, you will need to turn on Mirror so your design is facing the correct way when you go to iron it on.
You should be able to see the words flip around when you select the Mirror option.
Now you are ready to click on Continue and have your Cricut do the cutting.
Choose the type of iron-on material you will be using. Since you are using an iron-on material, you will need to place the shiny side down on the mat then follow the directions on the screen for loading your mat and the blade you should be using.
Step Five - Ironing On Design
Once you have cut the design you are ready to remove the "negative" pieces of vinyl from the backing, leaving the words and the backing intact.
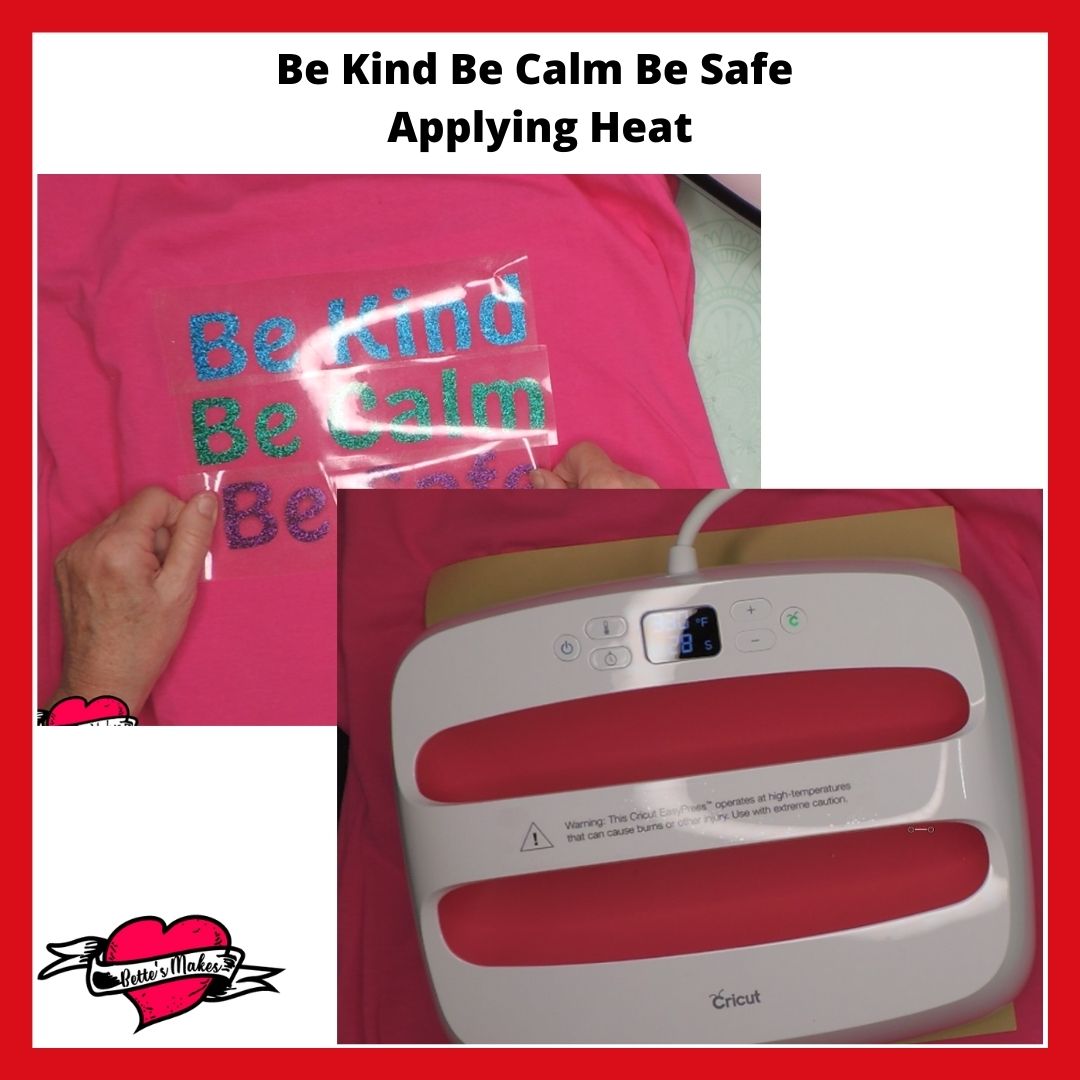
Place each word in position on the shirt or other surface you will be using. Line all the words up the way you want them.
Check to make sure you do not overlap any of the backing as the design will not adhere to your material as you have planned.
Prepare your heat pad and EasyPress.
Look up the heat guide for your surface and your material. For mine, it was 320 degrees for 30 seconds. Yours may be entirely different.
Apply the heat to the design.
If your design does not stick immediately, you can double the time suggested. I had to do this because I was using 100% cotton. If I had polyester in my t-shirt, the time would have taken a lot less.
Step Six - Show Off Your Make!
Now that your shirt is finished, it is time to share your make with the rest of us.
Time to show off your make in our Facebook group!
More Craft Ideas from BettesMakes
Here are some amazing crafts you can make from BettesMakes.com
This is just a sampling of the dozens of crafts you can find on my website.
Last Word
This glitter iron-on project was a lot of fun to make, it had 3 colors of glitter to work with. The idea of ironing on different colors and pieces of vinyl is often the scary part, but once you understand how to place and protect the vinyl, it becomes quite easy.
Making sure everything lines up the way you want it can be a challenge but if you use some heat tape to hold everything in place, it is a cinch.
I hope you enjoyed this project as much as I did.
If you made a T-Shirt, please share it on our Facebook group. https://Facebook.com/groups/BettesMakes
Until next time,
Happy Crafting!


Please join me on Pinterest: https://Pinterest.ca/BetteMakerCreations
Join my Facebook group: https://facebook.com/BettesMakes
Follow me on Instagram: https://Instagram.com/BettesMakes
Subscribe to my YouTube Channel: https://www.youtube.com/c/BettesMakes
