Slicing and Subtracting

Slicing and Subtracting are not the same!
As I was working on a project using hearts the other day, I wanted to cut out a piece that used a filigree pattern. After working with Slice and Subtract, I was not getting the desired result so had to find a workaround to add all my pattern pieces to the heart.
When to Subtract
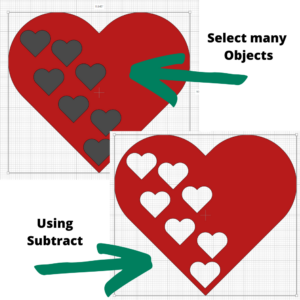
Subtract simply gets rid of anything that is on top of the bottom layer you have selected in your design. That means you can have a heart on the bottom and several shapes on top, select everything then use Subtract. The result is a heart with many shapes cut out! You can have as many objects as you wish this way and do the subtract all at once.
When to Slice
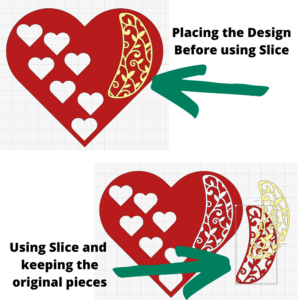
Slicing comes in handy when you want to keep the original piece and not just Subtract it (and remove it-the original piece will be lost).
If I wanted to keep the original shape such as my filagree pattern and use it again, then I would choose slice. The issue I ran across is that the pattern was cut out in reverse with smaller pieces being in place. This works when you have transfer paper and move the design to another surface. Actually the effect is beautiful.
How to Use Slice and Subtract Together
This takes a little more work but the results can be spectacular. You will also need to use additional tools for this including Contour, Offset, and Unite (or Weld).
The goal here is the make the heart all one piece and not several small pieces including the large heart.
Once you have sliced the filagree out as shown in the diagram above, you will want to remove the extra pieces in the middle. This is actually very easy to do using Contour.
Select one of the sliced design filagree pieces and then click on Contour at the bottom right of the layers panel. All you need to do here is click on Hide All Contours and then close the popup screen.
Next, you will want to line up the new piece (should be a solid shape) over the design on the heart. You will also want to adjust the size so that you are removing only the small pieces and not the outer large object. The easy way to do this is to use Offset and make the offset smaller than the solid piece (see the diagram below).
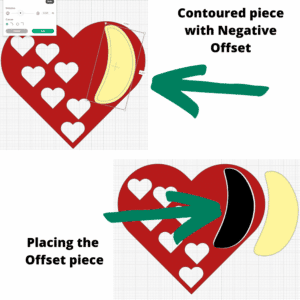
Once you have placed the offset into position, select the heart and the offset piece and subtract them. This will give you a hole where you can now place the filagree pattern.
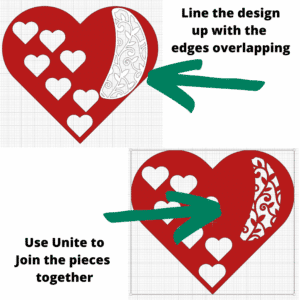
Now it is time to place the filagree over the hole (you will need to make sure the filagree is on the top layer - use Arrange Bring to Front).
Make any adjustments to the size of the filagree piece so that it covers the back object. This way you will reduce the chance that you will have extra gaps in your design.
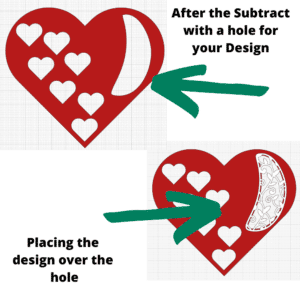
Last you will Unite the pieces together to make an amazing heart design!
If you want the filagree pieces to use for your own design, download it here.

 DIY Home Decor DIY Craft Tutorials, DIY Paper Flowers